Set Automatic Replies (Out of Office)
Use Automatic Replies to let people know you are away and will not respond to email right away. With your Microsoft 365 Exchange account, replies are sent from the server—so Outlook does not need to stay open on your computer.
Automatic replies work with your GFS Microsoft 365 / Exchange mailbox. Settings sync across Outlook on Windows, Mac, web, and mobile once saved.
Jump to a platform:
Classic Outlook for Windows
Video walkthrough
Steps
- Open Classic Outlook.
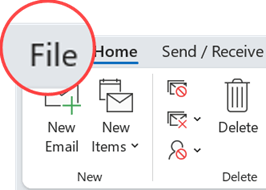
- Select the File tab on the far left of the ribbon.
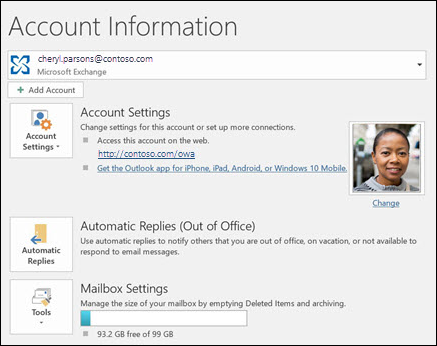
- On the Account Information page, select Automatic Replies.
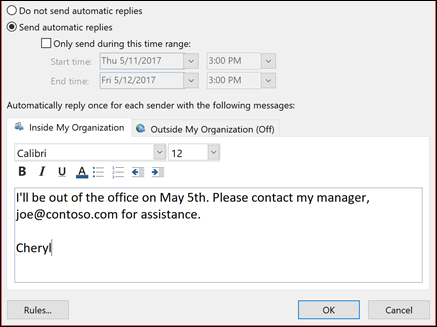
- Select Send automatic replies.
- (Optional) Check Only send during this time range, then choose a start and end date/time so replies turn off automatically when you return.
- On the Inside My Organization tab, type the message you want coworkers to receive.
- (Optional) Select the Outside My Organization tab, turn on replies for people outside GFS, choose My Contacts only or Anyone outside my organization, and enter a separate message.
- Select OK.
Prefer My Contacts only for outside replies. Sending to anyone outside your organization can reply to newsletters, ads, and junk mail.
Turn off automatic replies
When automatic replies are on, Outlook shows a yellow info bar under the ribbon. Select Turn off on that bar, or reopen File → Automatic Replies, choose Do not send automatic replies, and select OK.

Outlook for Mac
- Open Outlook on your Mac.
- In the navigation pane, select Mail.
- From the menu bar, select Tools → Automatic Replies.
- If you have more than one account, choose your GFS account from the dropdown.
- Turn on Send Automatic Replies.
- Under Message for inside your organization, enter your out-of-office message.
- (Optional) Turn on Send replies during a specific time period and set start and end dates/times.
- (Optional) Enable Message for outside your organization, choose Send only to my contacts or Send to everyone, and enter that message.
- Close the Automatic Replies window to save.
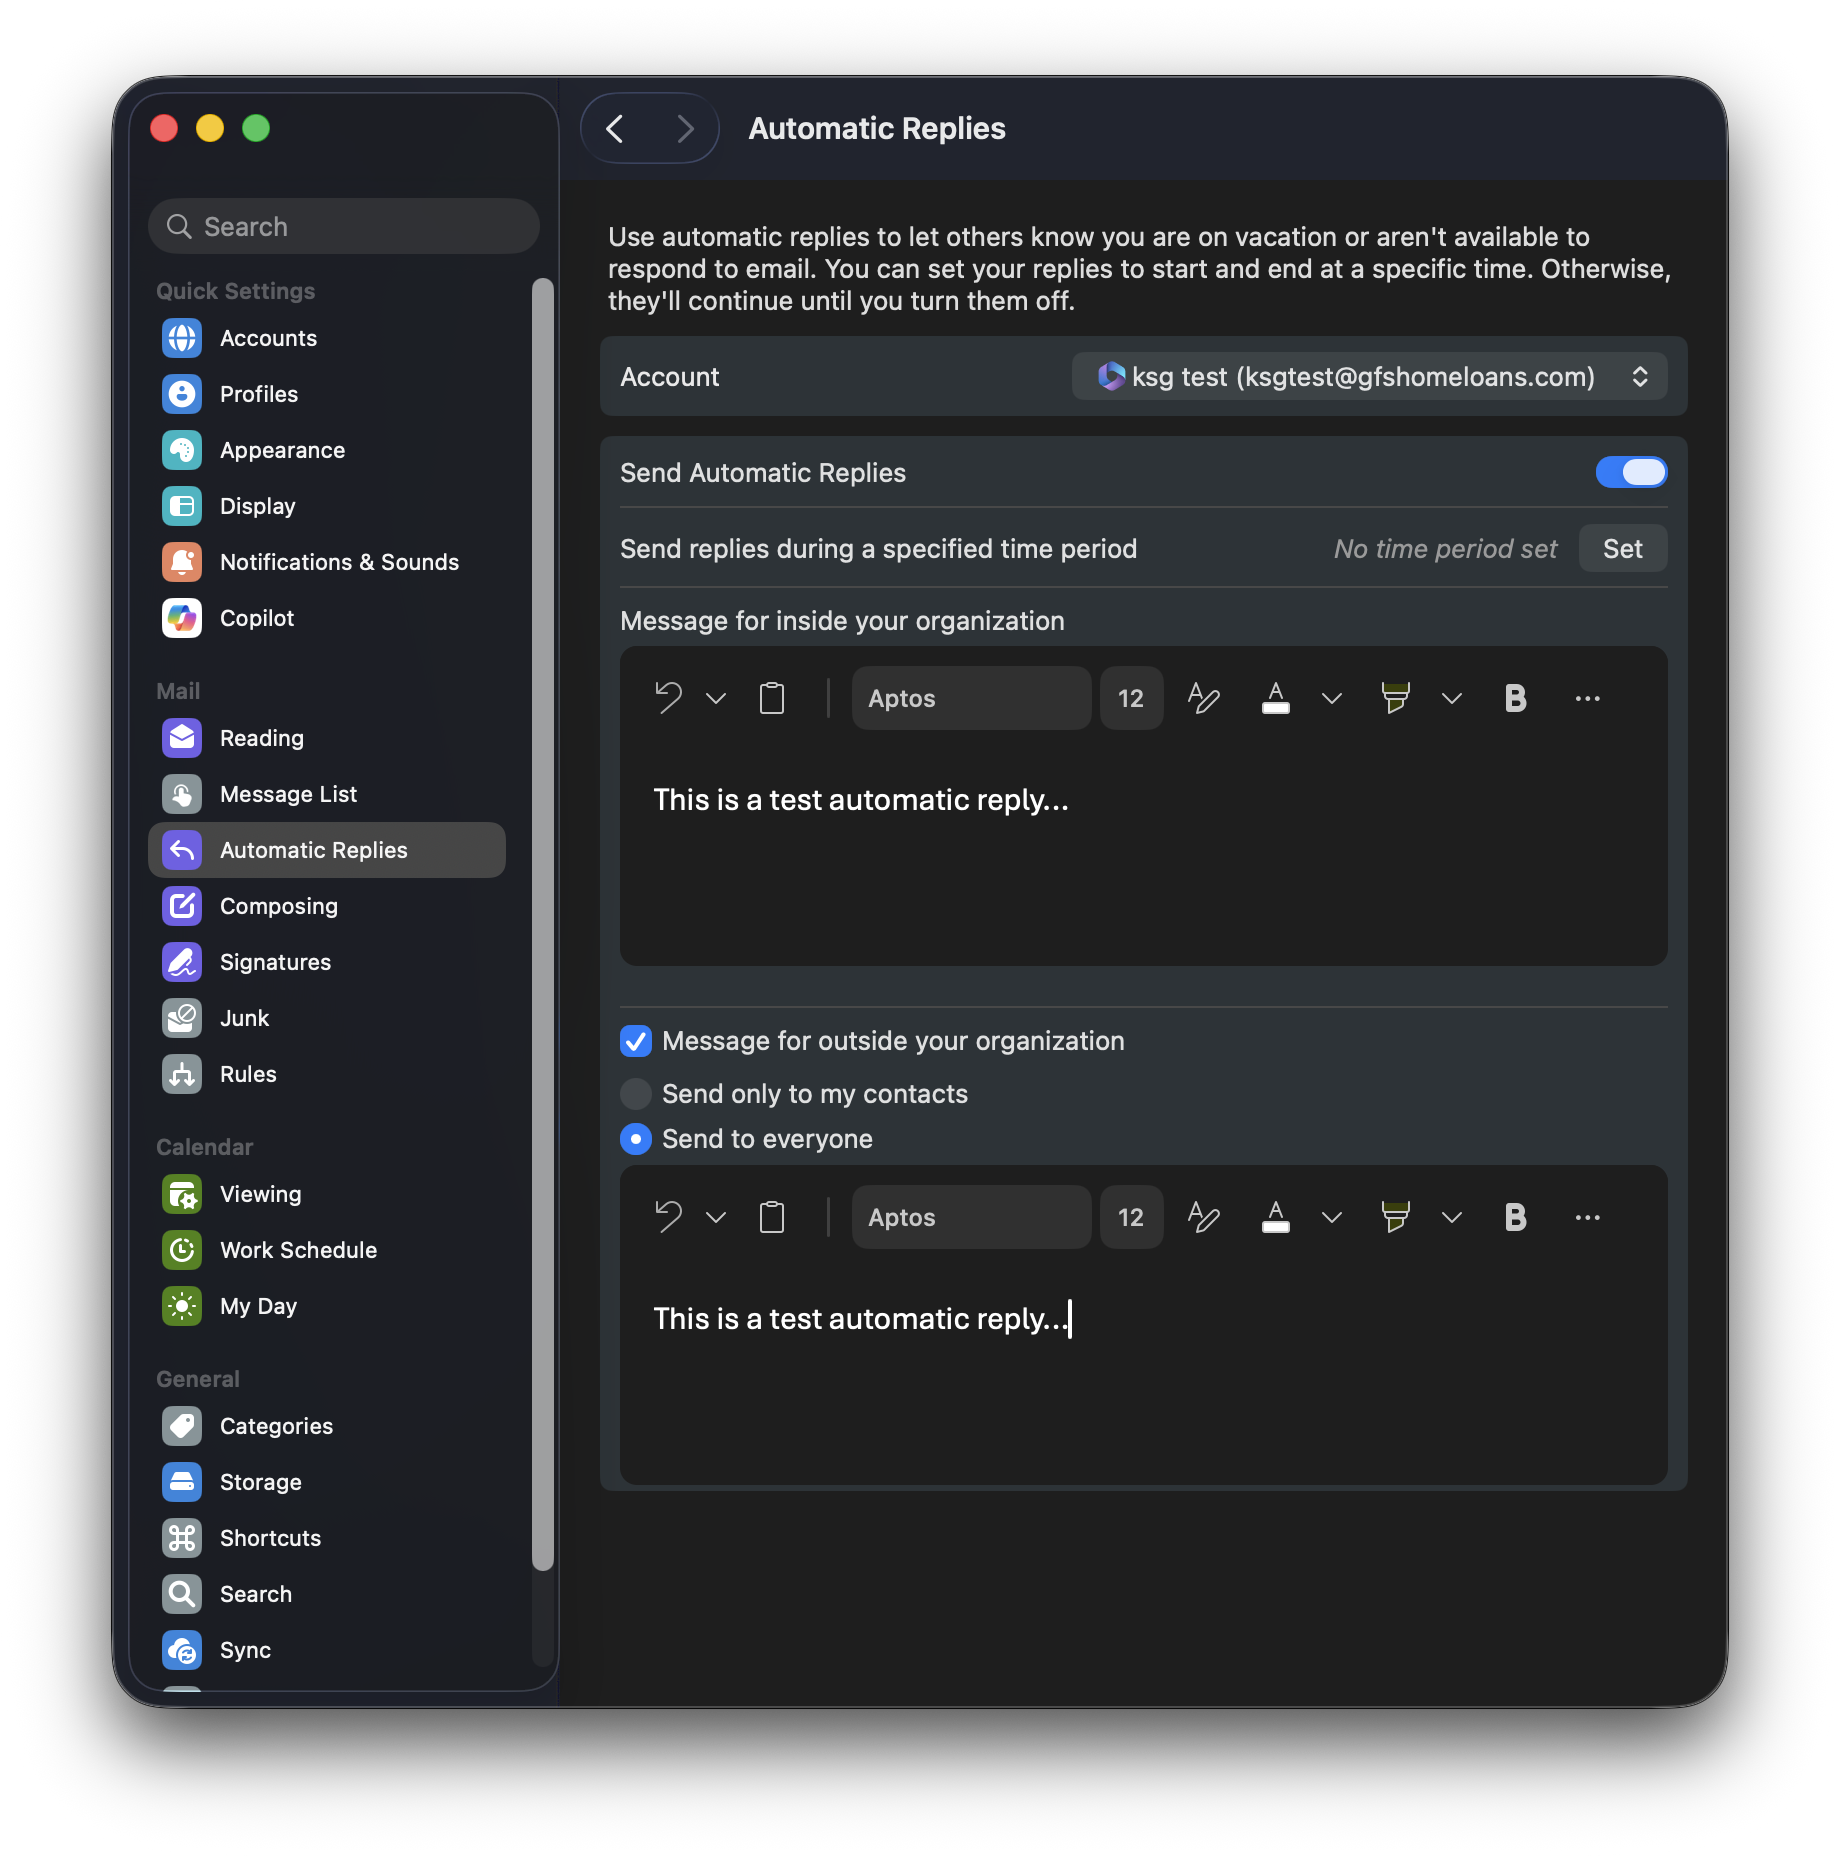
Mac screenshot is representative. Labels and layout may vary slightly by Outlook version.
Turn off on Mac
- Select Tools → Automatic Replies.
- Turn off Send Automatic Replies.
Outlook for iOS and Android
The steps are the same on iPhone, iPad, and Android.
- Open the Outlook app.
- Tap your profile picture or initials in the top-left corner.
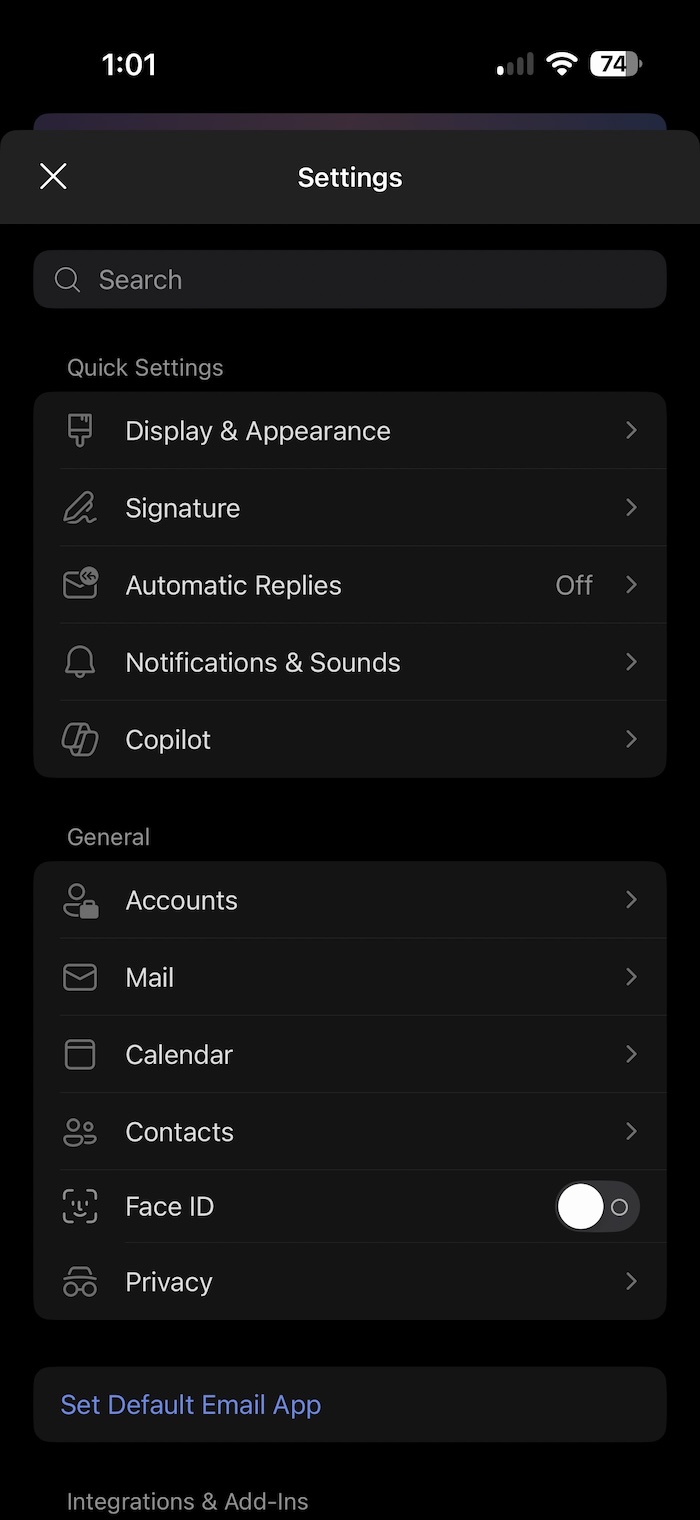
- Tap the Settings gear.
- Under Quick Settings, tap Automatic Replies.
- Find your GFS email account (and any shared mailbox, if needed).
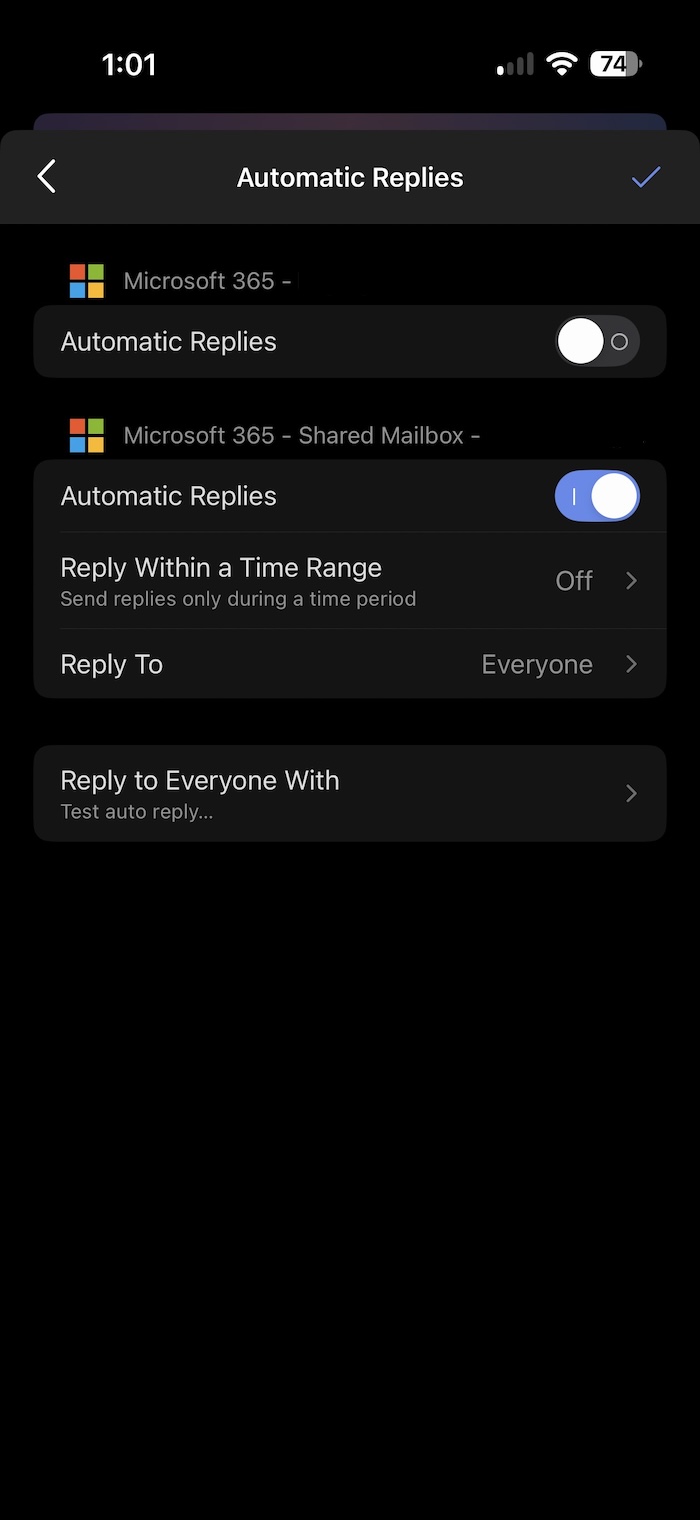
- Toggle Automatic Replies on for that account.
- (Optional) Tap Reply Within a Time Range to send replies only during a set period.
- Tap Reply To and choose Everyone or your organization only.
- Tap Reply to Everyone With (or the matching message field) and enter your out-of-office message.
- Tap the checkmark in the top-right corner to save.
Turn off on mobile
- Open Settings → Automatic Replies.
- Toggle Automatic Replies off for the account, then tap the checkmark to save.
Writing tips
- Include when you will return (or that you will reply when available).
- Suggest an alternate contact for urgent requests (for example, a teammate or shared mailbox).
- Keep outside messages shorter and avoid sharing personal details.
- Schedule an end date/time whenever possible so you do not forget to turn replies off.
Reference documentation
- How to set up out of office automatic replies in Outlook (Windows)
- Send automatic Out of Office replies from Outlook for Mac
- Enable out of office messages in Outlook for iOS and Android
Need help?
Contact IT support if Automatic Replies is missing or will not save.